
linux下如何tightvncserver安装使用图形化访问多用户
关闭防火墙、selinux(临时)
systemctl stop firewalld
systemctl disable firewalld
# 查询防火墙状态
systemctl status firewalld
setenforce 0
sed -i "s/SELINUX=enforcing/SELINUX=disabled/g" /etc/selinux/config
# 查询selinux状态
sestatus
安装VNC
yum -y install tightvnc-server
创建配置文件
cp /lib/systemd/system/vncserver@.service /etc/systemd/system/vncserver@:1.service

创建用户和设置tigervnc密码
创建用户
useradd user1
设置用户密码
passwd user1
切换账户
su user1
设置vnc远程登录的密码
vncpasswd
配置VNC文件
vim /etc/systemd/system/vncserver@:1.service

启动vnc服务并设置开机启动服务
开启VNC服务
systemctl start vncserver@\:1.service
开机启动服务
systemctl enable vncserver@\:1.service
关闭vnc服务
systemctl stop vncserver@\:1.service
修改VNC访问的密码
使用命令vncpasswd对不同用户的VNC的密码进行修改,注意:如果配置了不同用户的VNC需要分别到各自用户中进行修改
vncpasswd
远程控制连接
客户端上从官网下载 vncviewer,输入192.168.xxx.xxx:5901,密码是你为远程登录用户设置的密码

本文由 帝一博客 原创发布。用户在本站发布的原创内容(包括但不仅限于回答、文章和评论),著作权均归用户本人所有。独家文章转载,请联系邮箱:17762131@qq.com。获得授权后,须注明本文地址: https://bubukou.com/linuxyunwei/1939.html
-
一个小时学会搭建和使用 kubernetes
2021-12-07 17:36
-
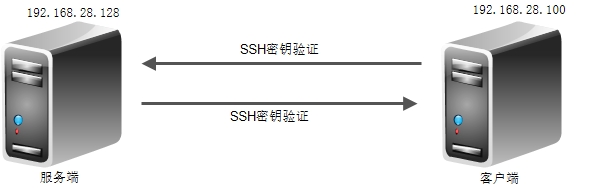
linux生成公钥私钥ssh远程实现直接免密登录
2021-05-11 10:31
-
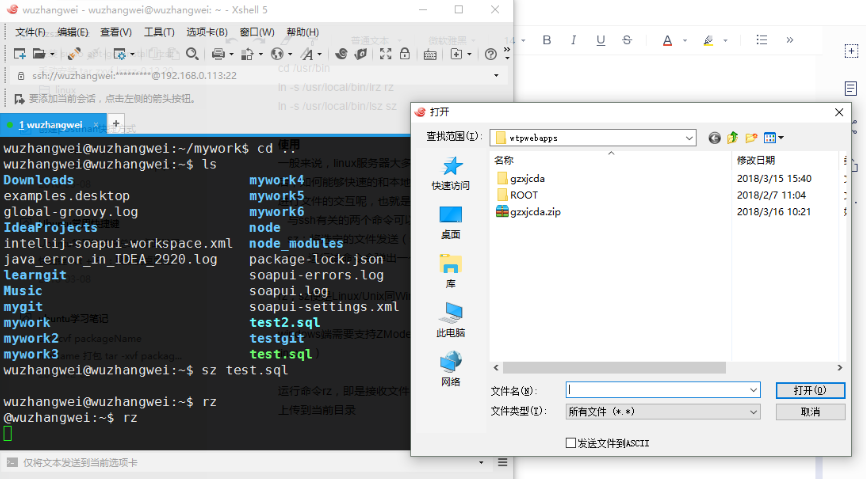
linux(centos)安装lrzsz上传下载软件rz,s...
2021-01-25 17:58
-
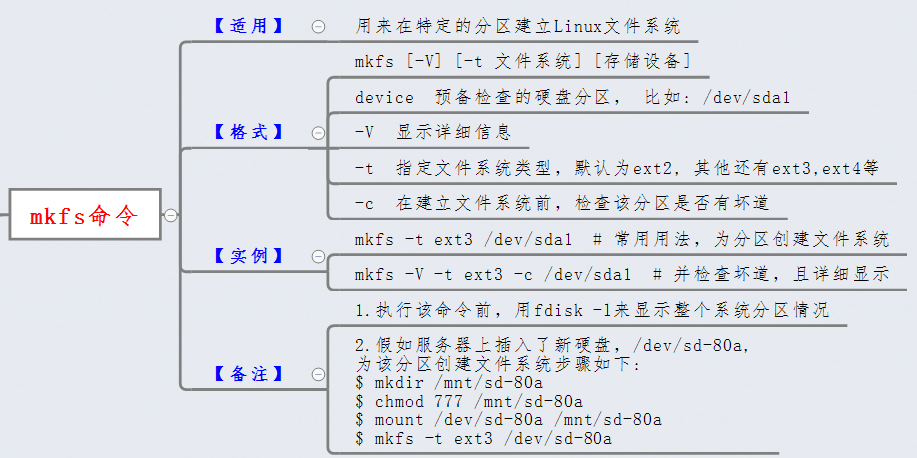
linux mkfs.ext4命令格式化硬盘
2021-01-15 14:54
-
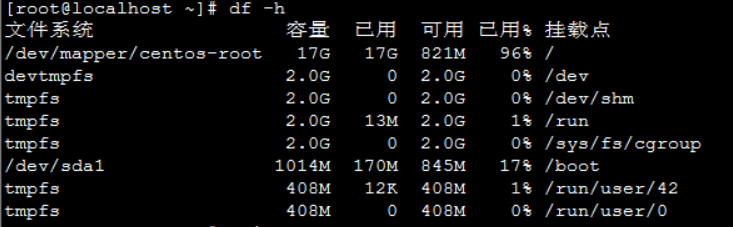
查看linux系统增加根目录空间不足
2020-12-31 11:28
-

linux下如何tightvncserver安装使用图形化访...
2020-12-28 19:03
-
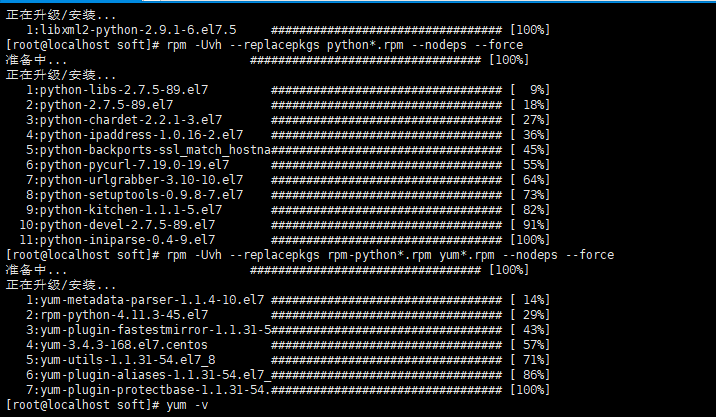
centos7中 yum跟python的安装【附带pytho...
2020-12-08 20:57
-
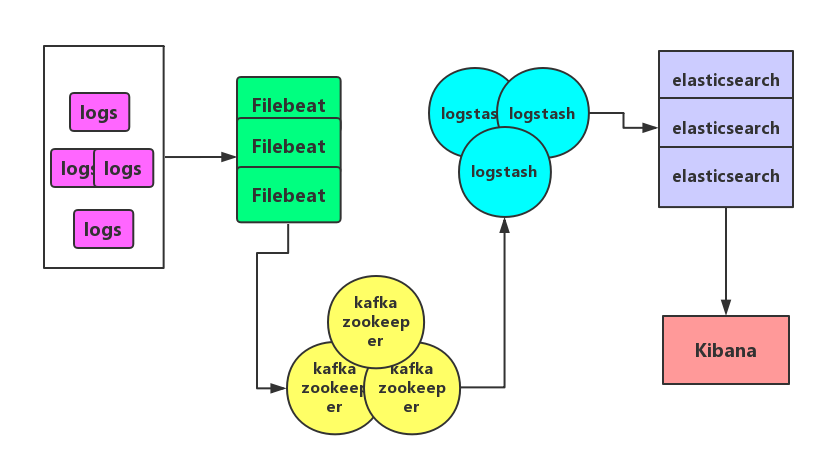
Centos 7.4系统Filebeat + Kafka +...
2020-12-07 10:45
-
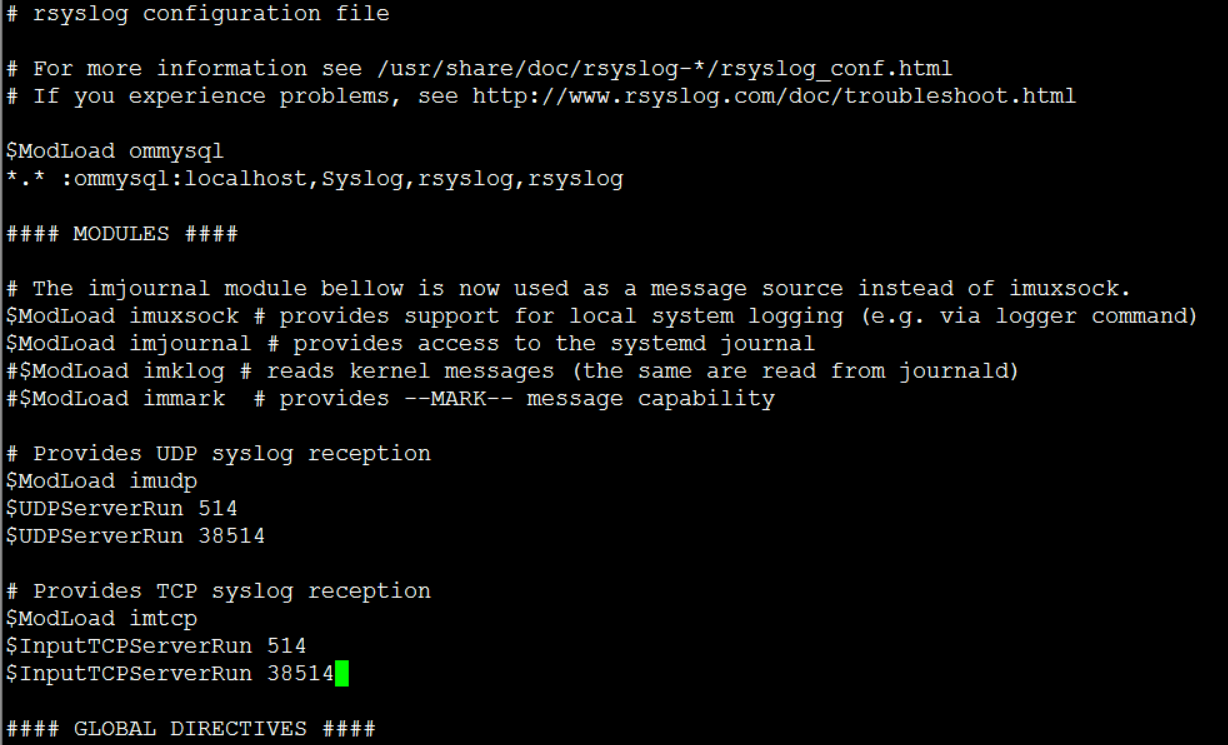
CentOS 7系统搭建Rsyslog+LogAnalyze...
2020-12-03 22:12
-
linux groups命令显示指定用户帐户的组群成员身份
2020-11-29 15:52
网友留言评论